
25 Apr The 5 Step Process of Replacing a Windshield
A cracked windshield can easily dismantle the safety features in your car, making you vulnerable to lots of dangers. If you drive around with a chip on your windscreen, it is more likely to keep progressing and turn into a hazard. Damage to your windshield can happen easily and accidentally. For example, you may wake up after a rainy night and find a tree branch has fallen on your windshield, or you’ve been mugged. Either way, you’ll be able to replace your windshield with the process we’ll list below.
The process of replacing a windshield is quite straightforward, and with the right tools, you can nail it easily. You may want to replace your windshield because your insurance doesn’t cover it, or maybe you just want to learn this new skill and save yourself some cash. Either way, once you’ve done it once, you can always do it whenever you need to. The process of replacing a windshield needs to be done precisely to ensure the safety of you and your passengers.
What is the process of replacing a windshield?
Most times, we tend to take our windshields for granted since it’s always there when we’re driving. However, once it’s cracked, it is important to replace it as soon as possible, and the process of replacing it needs to be done correctly for the safety of those who will board the vehicle.
The process of replacing a windshield includes:
- Taking out the rearview mirrors, plastic covers, rubber gaskets, and wipers.
- Using a cold knife, cut off the urethane seal
- Remove the windshield
- Remove excess urethane with a sharp object like a razor blade and clean the bonding area.
- Apply the urethane primer
- Run a bead of urethane around the perimeter
- Reinstall the windshield
- Allow the urethane to cure
- Replace the rubber gasket
Normally, it takes around 45-90 minutes to replace the windshield in regular trucks and vehicles. But you’ll find that the duration it takes depends on your car model and the complexity of replacing the windshield requires.
The 5 Step Process to Replacing a Windshield
Replacing your car’s windshield is a thorough process that you need to follow carefully to avoid making any mistakes. You should avoid mistakes because they can lead to regrets later since windshields are very sensitive.
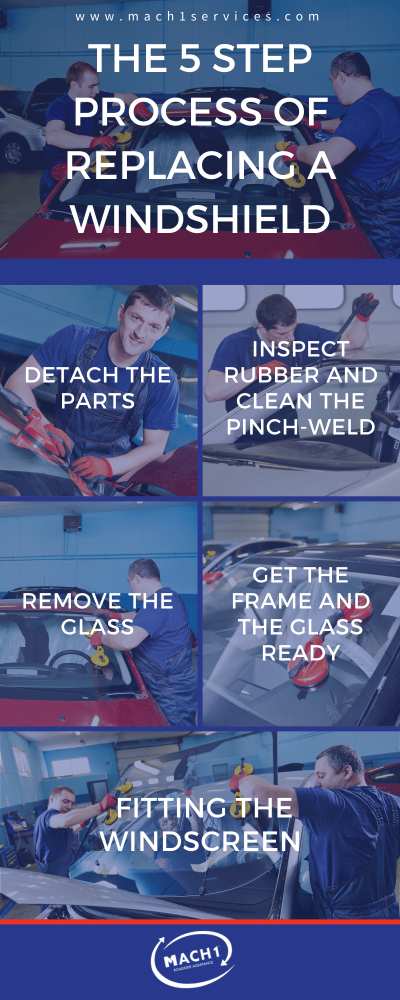
Detach the parts
You need to remove the parts that come in the way, like rearview mirrors, windshield wipers, and other components. There are clippings used to hold the molding into place. When removing the windshield, ensure you remove these clippings. There are different ways to remove these clippings, depending on the type. For example, there are some that you need to pull straight out, while others need to push in from either side or remove the middle first. Depending on your car model, they can be expensive to buy if you damage these. Some car clippings can be extremely hard to come by. So, be careful when taking these off.
Inspect the windshield rubber and clean the pinch-weld
It would help if you analyzed whether the windscreen rubber is damaged or not. If it’s damaged, you need to remove it with a sharp pointy object. When removing a windshield, you should also check the pinch-weld to analyze what angle you will use to remove it. The pinch-weld is an area in the format of the car where different metal components are welded together.
Since the pinch-weld provides structure and form to the windshield, cutting off the windshield from the pinch-weld is necessary to separate them properly. To do this, you can either do it from the inside or outside the car using a cold knife or razor.
Urethane is a strong, flexible, polymer-based adhesive. You must cut through the urethane to remove the windshield. Before you decide to cut it from the outside, check how close the windshield has been to the pinch-weld. If there’s less than ⅛” of urethane, you’ll have no room to drag it properly. The knife’s lack of space can cause many glass breakages, causing a huge mess.
Alternatively, you can cut off the windscreen from the inside. You’ll have to use an extended handle razor knife to do this. You’ll have to do so in a repeated dragging motion. When you take it to the shop, professionals use power cutters which are much faster, even though they cause more damage to the metal pinch-weld.
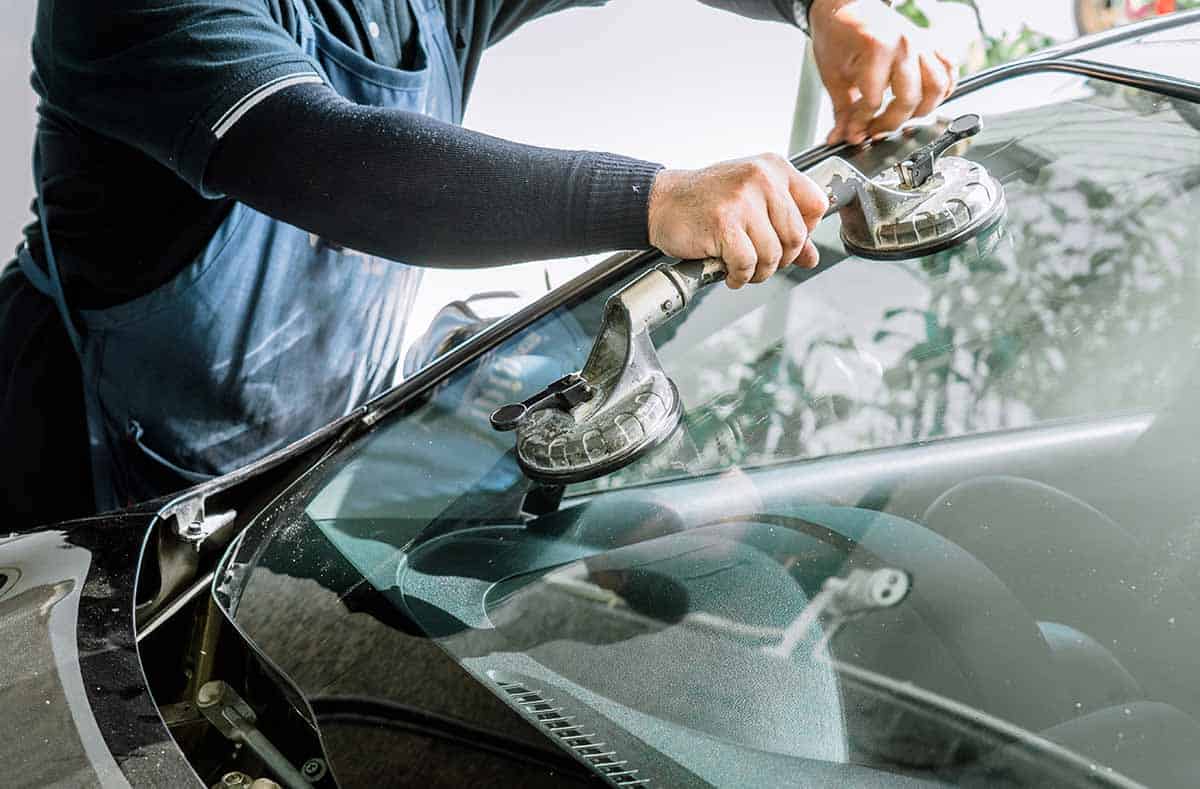
Remove the glass
To remove the glass, you’ll need an extra pair of hands. This part of the job can’t be done by one person only. You will have someone on the inside of the car pushing it gently outside from the pinch-weld. The one on the outside should hold the glass and lift it straight up off the pinch-weld.
Get the frame and the glass ready.
Before putting in the new glass, you need to clean the frame. Now that you’ve removed the windshield, you’ll need to clean the pinch-weld. You can clean away any dirt using a brush and water. When there is dirt or contaminants on the pinch-weld, it will reduce the adhesion of the urethane and the windshield.
After cleaning it up, you should also trim off excess urethane with a razor. Normally, the pinch-weld contains old urethane that’s about ¼” thick. This will need some trimming down to 3mm. You will also need to clean up the pinch-weld to remove excess dust or rust. Any areas containing damaged urethane will need to be sanded back to bare metal to get rid of the rust.
If there are areas not sanded, you’ll need to cover them with tape, sheets of paper, or plastic. Doing so will prevent the primer from getting on anything other than bare metal. After you’ve protected areas that aren’t metal-based, you can now apply primer on every bare metal to keep it from rusting in the future. Priming metal also helps with the adhesion of urethane. To prime the metal, you’ll need to spray on three even layers of coats of primer. It is better not to put on a heavy coat of the primer.
Fitting the windscreen
This part of the job requires a helper. A windshield is heavy, and you’ll need someone to help you fix it up. You will need to place the windshield on the frame gently. Before you get to put it on the windshield, you’ll need to apply the primer to the frit band. The frit band is the black band that goes around the windshield perimeter. The main use of the primer is to help the molecules of the frit band to accept the urethane molecules.
To apply the urethane, you’ll need an electric caulking band which you can purchase from your local hardware store. To install the windshield, you’ll need to align the top, bottom, and sides carefully. You will set the windshield on top of the pinch-weld. Some cars have a mounting block where you can rest the bottom of the windshield, while others don’t.
When placing the windshield, be careful not to touch the frit band since the oils and dirt on your hands can easily contaminate the activated glass and reduce adhesion to urethane. Sometimes installers tape the windshield in place to hold it until the urethane dries off. Don’t drive until the urethane dries off.
Is it hard to replace your windshield?
The answer to this isn’t as straightforward as you may think. First off, it can be challenging to replace a windshield if you’ve never done it before. But if you have some knowledge and experience of doing it, it won’t be as difficult. Someone who does not know anything to do with windscreens can find it extremely difficult to change a windscreen.
A professional should replace a windshield if you aren’t sure how to do it. As seen in the steps above, making a few mistakes during the installation process of a windshield can cause lots of problems. The best bet you can place is taking your car to a professional. There’s no need to replace the windshield yourself if you’re unsure how to do it. It isn’t worth the risk considering you’ll be putting yourself and your passengers in harm’s way.
Can you drive a car immediately after windshield replacement?
You can’t drive immediately after a windshield replacement; you need to wait for it to set completely. If your technician is fixing it for you, you may need to wait until they give you the go-ahead. Depending on the type of car you have, it can take between thirty minutes to twenty-four hours to set completely and for you to drive off safely. A technician might recommend the least amount of time for you to start driving off, so you can give it more minutes on top of what’s recommended to ensure it’s completely set.
Most of the time, the amount of time it takes for you to be able to drive away safely solely depends on the type of adhesive and glass used to replace your windscreen. Besides these two factors, environmental factors also determine how long it will take for the windscreen to set. For example, humidity level, outside temperature, and weather conditions. Adhesives take a shorter time to set during summer compared to winter due to high humidity levels and warm temperatures. You will have to wait for a longer duration during winter before driving off.
If you drive off immediately after the windshield replacement, it may result in problems or complications in the windshield in the future. The windshield may shift if you drive off before it sets. Also, being impatient may cost you a lot in the future because it will pop out during an accident, causing more trouble rather than keeping you inside the vehicle.
Final Thoughts
Replacing your car’s windshield can be a little difficult, and it’s better to have a professional handle the entire process. If a professional handles your car windshield replacement, you’ll be in better hands and know when to drive off. You will also be sure that your windshield will protect you like it’s supposed to during an accident. But if you can replace a windshield on your own successfully, then the above process will work perfectly for you, and you should give it a try. Follow the steps thoroughly and ensure you wait long enough for the windshield to set before driving off with the car.